GE Universal Remote Control Instruction Manual — Overview
This manual guides users through setup and programming of GE Universal Remote models RM24918 & RM84918, offering control for diverse devices, alongside helpful online resources․
Welcome to the world of simplified home entertainment control! This GE Universal Remote is designed to consolidate multiple remotes into one convenient device․ It’s compatible with a vast array of brands and devices, including TVs, DVD/Blu-ray players, cable/satellite boxes, and auxiliary devices like soundbars․
This instruction manual will walk you through the initial setup, programming procedures – both automatic code search and direct code entry – and advanced features like macro programming (if applicable)․ We’ll also address common troubleshooting issues to ensure a seamless user experience․
Access additional support through online FAQs and dedicated help centers for Google Earth, Maps, and Gmail, should you require further assistance․ Enjoy effortless control of your entertainment system!
Remote Control Models Covered (RM24918 & RM84918)
This instruction manual applies specifically to two GE Universal Remote models: RM24918 and RM84918․ While functionally similar, slight variations in button layout or advanced features may exist between the two․ Refer to the diagrams within this manual to identify the specific components on your remote model․
Both models are designed for universal compatibility, aiming to replace multiple remotes․ They support a wide range of devices, utilizing extensive code libraries for various brands․ The programming instructions detailed herein are applicable to both RM24918 and RM84918, ensuring a consistent setup process․
For specific inquiries related to either model, please consult the GE customer support resources listed in the warranty section․
Getting Started
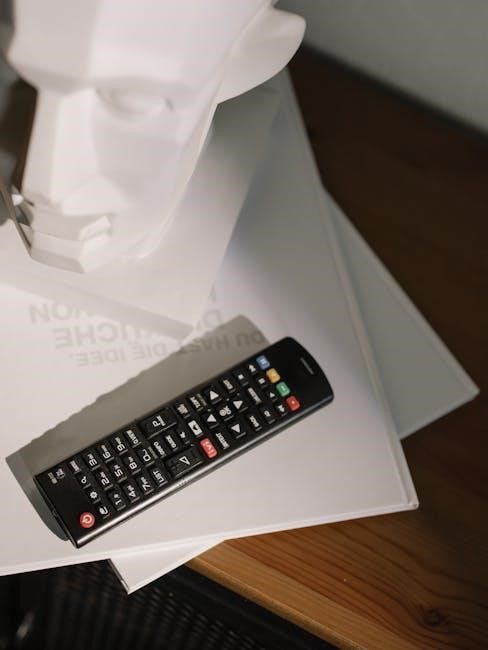
Begin by verifying package contents, installing batteries correctly, and familiarizing yourself with the remote’s layout and button functions for optimal use․
Package Contents
Upon opening your GE Universal Remote package, please ensure all components are present․ You should find one GE Universal Remote Control (either model RM24918 or RM84918), and this comprehensive instruction manual to guide you through the setup and operation of your new device․
Carefully inspect the packaging for any signs of damage during shipping․ If any items are missing or appear damaged, immediately contact GE Customer Support for assistance – details are provided later in this manual․ Retain the original packaging for potential returns or warranty claims․ Properly accounting for all included items ensures a smooth and hassle-free initial experience with your GE Universal Remote․
Installing Batteries
To begin using your GE Universal Remote, you must first install batteries․ Locate the battery compartment on the back of the remote control․ Gently slide the compartment cover open․ Insert two fresh AA batteries, ensuring correct polarity – match the (+) and (-) markings inside the compartment to the batteries themselves․
Incorrect battery installation will prevent the remote from functioning․ Once the batteries are securely in place, slide the compartment cover closed until it clicks into position․ We recommend using alkaline batteries for longer life․ Replace batteries when the remote’s range decreases or stops responding․ Dispose of used batteries responsibly, following local regulations․
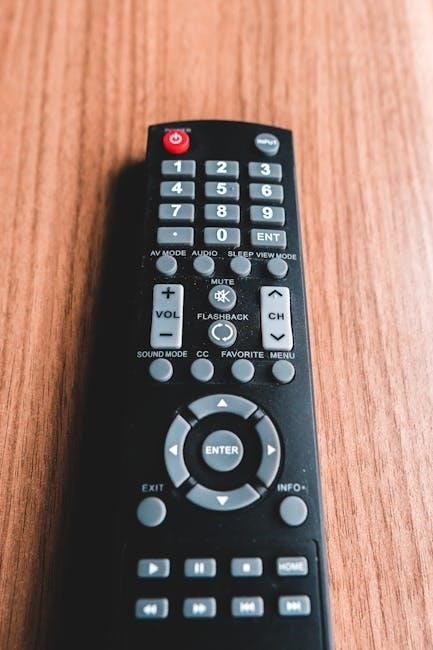
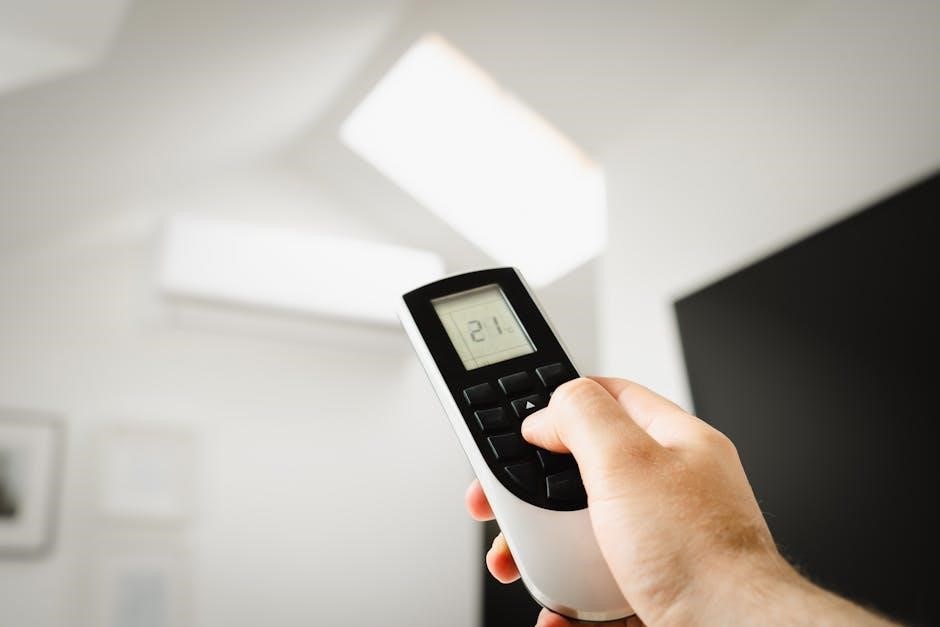
Remote Control Layout & Button Functions
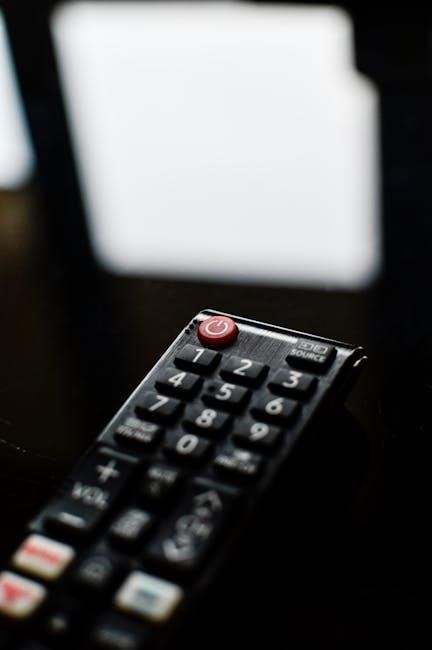
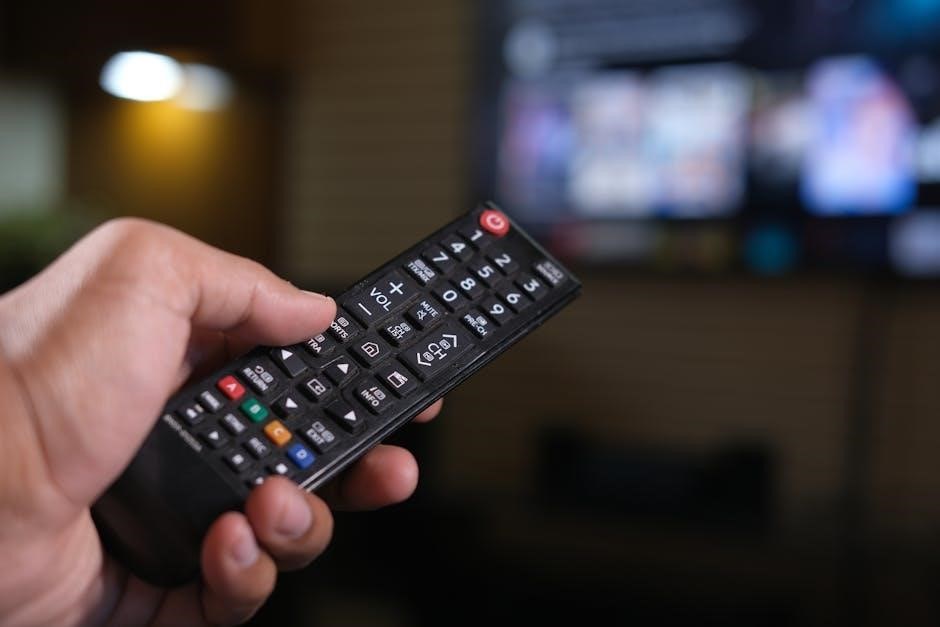
The GE Universal Remote features a thoughtfully designed layout for intuitive operation․ The power button, centrally located, controls device on/off functions․ Number buttons directly access channels․ Volume and channel controls allow easy adjustments․ Dedicated buttons for input selection, menu navigation, and playback control (play, pause, stop, rewind, fast forward) enhance usability․
The ‘Mode’ button selects the device you wish to control (TV, DVD, Cable, etc․)․ The ‘Set’ or ‘Enter’ button confirms selections․ A ‘Mute’ button silences audio․ Explore each button to familiarize yourself with its function․ Refer to the diagrams within this manual for precise button locations and their corresponding actions․

Programming the Remote
Effortlessly program your GE Universal Remote using automatic code search, direct code entry, or brand-specific code lists for seamless device control․
Automatic Code Search Programming
The Automatic Code Search method is a convenient way to program your GE Universal Remote without knowing your device’s specific code․ Begin by turning on the device you wish to control – for example, your TV․ Then, press and hold the ‘Setup’ or ‘Magic’ button on the remote until the indicator light turns on․
Next, enter the device type code (e․g․, 0 for TV, 1 for VCR) using the number buttons․ The remote will then begin sending out codes, and the device should respond․ When the device responds – meaning it turns off or changes channel – immediately press the ‘Power’ button to lock in the code․ If the device doesn’t respond after several attempts, repeat the process with the next device type code․
Direct Code Entry Programming
Direct Code Entry allows programming your GE Universal Remote using a specific code for your device brand․ First, locate the code for your device’s brand within the included code list – these are organized by manufacturer․ Turn on the device you intend to control․ Press and hold the ‘Setup’ or ‘Magic’ button until the indicator light illuminates․
Enter the 5-digit code corresponding to your device’s brand using the number buttons․ The indicator light should blink or turn off, confirming code entry․ Then, test the code by pressing the ‘Power’ button․ If the device responds, the code is correct․ If not, repeat the process with another code for your brand from the code list․
Using Code Lists for Specific Brands
The GE Universal Remote comes with extensive code lists organized by brand, facilitating easy programming․ These lists contain multiple codes per brand, as compatibility can vary․ Locate your device’s manufacturer in the list – it’s crucial to select the correct brand for successful programming․
Each brand entry features several 5-digit codes․ If the first code doesn’t work, systematically try subsequent codes listed for that brand․ Remember to test each code after entry by attempting a basic function like powering the device on or off․ Patience is key, as finding the correct code may require trying several options within the brand’s code set․
Troubleshooting Programming Issues
If programming fails, double-check the selected brand and code․ Ensure accurate entry; even a single incorrect digit prevents functionality․ Try resetting the remote to factory defaults and repeating the programming process from the beginning․ If multiple codes are available for your brand, exhaustively test each one․
Interference from strong lighting can sometimes disrupt the signal during code entry․ Also, confirm the device is within range and directly visible to the remote․ If issues persist, consult the online support resources or FAQs for further assistance, as specific device quirks may require unique solutions․
Controlling Your Devices
This section details how to operate your TV, DVD/Blu-ray player, cable/satellite box, and auxiliary devices, utilizing programmed codes for seamless control․
TV Control Functions
Power: Turns the TV on and off․ Ensure the remote is programmed with the correct code for your TV brand for this function to operate correctly․
Volume Control: Adjusts the TV’s volume levels․ Utilize the Volume Up and Volume Down buttons for desired sound adjustments․
Channel Control: Changes TV channels․ Use the Channel Up and Channel Down buttons, or directly enter channel numbers using the number pad․
Input/Source: Selects different input sources (HDMI1, HDMI2, AV, etc․)․ Repeatedly press the Input button to cycle through available sources․
Mute: Silences the TV’s audio output․ Press the Mute button to toggle sound on or off․
Menu: Accesses the TV’s on-screen menu for settings adjustments․ Navigate the menu using the directional buttons and select with OK/Enter․
Navigation: Use the directional buttons (Up, Down, Left, Right) to navigate through menus and on-screen displays․
DVD/Blu-ray Player Control
Power: Turns the DVD/Blu-ray player on and off․ Proper code entry is crucial for this function to work reliably with your specific player model․
Play/Pause: Starts or pauses disc playback․ Use the Play button to begin playback and the Pause button to temporarily halt it․
Stop: Halts disc playback and returns to the starting point․ Press the Stop button to completely stop the disc․
Fast Forward/Rewind: Skips ahead or goes back during playback․ Use these buttons for quick navigation through the disc content․
Menu: Accesses the DVD/Blu-ray player’s on-screen menu․ Navigate using directional buttons and select with OK/Enter․
Eject: Opens the disc tray for disc insertion or removal․ Press the Eject button to open the tray․

Navigation: Utilize directional buttons for menu navigation and on-screen control․
Cable/Satellite Box Control
Power: Turns your cable or satellite box on and off․ Ensure the correct code is programmed for reliable power control functionality․
Channel Up/Down: Changes channels on your cable or satellite service․ Use these buttons to browse through available channels․
Volume Up/Down: Adjusts the audio volume of your cable or satellite box․ Control the sound level directly from the remote․
Mute: Silences the audio output from the cable or satellite box․ Quickly mute the sound when needed․
Guide: Accesses the program guide for your cable or satellite provider․ View scheduled programming information․
Menu: Opens the on-screen menu of your cable or satellite box․ Navigate and customize settings․
OK/Enter: Selects options within the cable/satellite box menu or confirms choices․
Auxiliary Device Control (e․g․, Soundbar)
Device Selection: First, ensure your soundbar or auxiliary device is powered on; Then, program the remote using a compatible code from the code list․
Power: Controls the power state of the auxiliary device․ Verify the code enables reliable on/off functionality․
Volume Up/Down: Adjusts the volume level of the connected soundbar or auxiliary device․ Control audio directly․
Mute: Silences the audio output from the auxiliary device․ Quickly mute sound when necessary․
Input Selection: Cycles through available input sources on the auxiliary device (e․g․, HDMI, Optical)․
Specific Functions: Some codes may support additional functions like bass boost or sound modes, depending on the device․
Advanced Features
Explore macro programming for customized commands and, if available, the learning function to copy signals from original remotes, plus volume lock․
Macro Programming
Macro programming allows you to combine multiple remote control functions into a single button press, streamlining complex operations․ This feature is incredibly useful for activities like watching movies, where you might want to power on the TV, select the correct input, and start the DVD player with one touch․
To create a macro, you’ll typically need to enter a macro recording mode on the remote․ Then, press the buttons in the sequence you desire – for example, Power, Input, Play․ The remote stores these commands․ Finally, assign the macro to a specific button on the remote for easy access․ Refer to the specific model instructions (RM24918 or RM84918) for detailed steps, as the process can vary slightly․ Experiment with different sequences to optimize your viewing experience!
Learning Function (If Applicable)
Some GE Universal Remote models feature a learning function, enabling the remote to copy signals from your original remote controls․ This is particularly helpful for devices not included in the pre-programmed code list or for functions with unique commands․ To utilize this feature, you’ll generally need both the GE remote and the original remote․
Enter learning mode on the GE remote, select the button you want to program, and then point the original remote towards the GE remote․ Transmit the desired signal from the original remote․ The GE remote should confirm successful signal acquisition․ Repeat this process for each function you wish to learn․ Consult your specific model’s manual (RM24918 or RM84918) for precise instructions, as the learning process can differ․
Volume Lock Function
The Volume Lock function prevents accidental volume changes, particularly useful when children are using the TV or to avoid disruptions during critical viewing moments․ This feature typically locks the volume buttons on the GE Universal Remote, while still allowing channel changes and other functions․
To activate Volume Lock, usually a combination of buttons needs to be pressed simultaneously – consult your RM24918 or RM84918 model’s manual for the specific key combination․ A visual indicator, like an on-screen message or a lit LED, will confirm activation․ Repeat the button combination to unlock the volume․ This ensures controlled audio levels and a more peaceful entertainment experience․

Troubleshooting
This section offers solutions for common issues, such as the remote not responding, incorrect code entry, or devices failing to power on/off, ensuring smooth operation․
Remote Not Responding
If your GE Universal Remote isn’t responding, begin with the simplest checks․ First, ensure fresh batteries are correctly installed, observing proper polarity․ Try replacing the batteries with a brand-new set, even if the existing ones seem partially charged․ Next, verify there are no obstructions between the remote and the device you’re attempting to control․
Also, confirm the device itself is powered on and functioning correctly․ If the issue persists, attempt a reset of the remote to its factory defaults – instructions for this are detailed in the ‘Settings & Customization’ section․ Finally, double-check that you’ve entered the correct code for your specific device brand; an incorrect code will prevent communication․
Incorrect Code Entered
Experiencing issues with device control often stems from an incorrect code entry․ If buttons aren’t functioning as expected, revisit the programming steps․ Double-check the code list for your device’s brand, ensuring accurate input․ Remember that codes are brand and model-specific; a slightly wrong number can cause malfunctions․
If using Automatic Code Search, allow the remote to cycle through all codes – this process can take time․ For Direct Code Entry, carefully re-enter the code, verifying each digit․ If multiple codes are listed for your brand, try each one sequentially until you find the correct match․ Refer to the comprehensive code lists available online for assistance, and consider repeating the programming process․
Device Not Powering On/Off
If your device isn’t responding to the power button, several factors could be at play․ First, confirm the device itself has power – check the outlet and power cord․ Next, ensure the remote is correctly programmed for that specific device, verifying the entered code․ Sometimes, a device may not fully support all remote functions, particularly older models․
Try a different code from the list, as some codes offer limited functionality․ Also, ensure there are no obstructions between the remote and the device’s IR sensor․ If the issue persists, resetting the remote to factory defaults and re-programming it can often resolve the problem․ Consult online resources or GE support for further troubleshooting․

Settings & Customization
Explore options to personalize your remote experience, including resetting to factory defaults and adjusting backlight settings for optimal visibility and user preference․
Resetting the Remote to Factory Defaults
Occasionally, you may need to restore your GE Universal Remote to its original factory settings․ This is particularly useful if you’ve encountered programming difficulties, forgotten custom settings, or are preparing to use the remote with a completely new set of devices․ To initiate a factory reset, locate the reset button – its position varies depending on the specific model (RM24918 or RM84918), but it’s often a small recessed button․
Using a paperclip or similar small object, gently press and hold the reset button for approximately 5-10 seconds․ The remote may briefly flicker or display a confirmation message․ After releasing the button, the remote will return to its default state, erasing all previously entered codes and custom configurations․ You will then need to reprogram the remote for each of your devices, following the instructions outlined in the ‘Programming the Remote’ section of this manual․
Adjusting Backlight Settings
The GE Universal Remote features an adjustable backlight, enhancing visibility in low-light conditions․ To customize the backlight, locate the dedicated ‘Backlight’ button on the remote – its exact placement may differ slightly between the RM24918 and RM84918 models․ Pressing this button typically cycles through various backlight settings, including Off, Low, and High brightness levels․
Continue pressing the ‘Backlight’ button until you reach your preferred illumination level․ Some models may also offer an ‘Auto’ setting, where the backlight activates automatically when the remote detects low ambient light․ Experiment with the different settings to find what best suits your viewing environment and personal preference, ensuring comfortable and convenient operation․

Warranty Information
GE Universal Remote Controls are backed by a limited warranty, covering defects in materials and workmanship․ Contact GE Customer Support for details and claims․
GE Universal Remote Control Warranty Details
GE warrants this Universal Remote Control against defects in materials and workmanship for a period of one year from the date of original purchase․ This warranty covers normal household use and does not extend to damage resulting from misuse, abuse, accidents, alterations, or unauthorized repairs․
During the warranty period, GE will, at its option, repair or replace the defective remote control with a new or refurbished unit․ To obtain warranty service, please contact GE Customer Support with proof of purchase․ This warranty gives you specific legal rights, and you may have other rights which vary by location․
This warranty does not cover batteries or any consequential damages․ Any attempt to disassemble or repair the remote control by unauthorized personnel will void the warranty․ The warranty is valid only for the original purchaser and is not transferable․
Contacting GE Customer Support
For assistance with your GE Universal Remote Control, or to inquire about warranty claims, GE Customer Support is readily available through multiple channels․ You can reach them via phone during business hours – specific times may vary, so checking the official GE website is recommended․
Alternatively, GE offers comprehensive online support, including FAQs, troubleshooting guides, and downloadable manuals, accessible through their official website․ Many users find solutions to common issues within these resources․
Email support is also an option, allowing for detailed inquiries and documentation submission․ When contacting support, please have your remote control model number (RM24918 or RM84918) and proof of purchase readily available to expedite the process․
Additional Resources
Explore online FAQs, support communities, and dedicated help centers for Google Earth, Maps, and Gmail, offering related assistance and troubleshooting guidance․
Online Support & FAQs
Access a wealth of self-help resources online to quickly resolve common issues with your GE Universal Remote․ The official GE support website provides frequently asked questions (FAQs) covering initial setup, programming procedures, and troubleshooting steps for various device compatibility challenges․
Beyond the official site, explore community forums where fellow users share tips, solutions, and experiences․ These platforms often contain answers to niche problems not explicitly addressed in the manual․ Don’t hesitate to search for specific error codes or device models to pinpoint relevant discussions․
Remember to also leverage the broader Google support ecosystems, including the Google Earth, Maps, and Gmail Help Centers, for general assistance with related technologies and potential connectivity issues․
Google Earth/Maps/Gmail Help Centers (Related Support)
While seemingly unrelated, Google’s support resources can assist with connectivity or software issues impacting your remote’s functionality․ If you experience problems updating firmware or accessing online code lists, the Gmail Help Center offers guidance on account access and browser compatibility․
Troubleshooting network connectivity for smart features might benefit from insights within the Google Maps Help Center, particularly regarding location services and internet access․
Furthermore, the Google Earth Help Center’s tutorials on software updates and troubleshooting can provide a broader understanding of device management, potentially resolving conflicts with your smart home ecosystem․ These resources offer supplementary support beyond the direct remote control manual․