The Honeywell T6 Pro Wi-Fi Thermostat is a smart, programmable device designed for optimal home comfort. It offers Wi-Fi connectivity, voice control, and compatibility with the Honeywell Home app, enabling remote temperature management. With its sleek design and advanced features, it integrates seamlessly with various HVAC systems, providing energy efficiency and convenience. This thermostat learns your system’s behavior to optimize heating and cooling, ensuring comfort at your preferred times. The manual guides you through installation, setup, and configuration to maximize its features.
1.1 Overview of the Honeywell T6 Pro Wi-Fi Thermostat
The Honeywell T6 Pro Wi-Fi Thermostat is a programmable smart thermostat designed for seamless temperature control. It features a sleek, modern design and offers compatibility with the Honeywell Home app for remote management. With Wi-Fi connectivity, voice control, and geofencing capabilities, it ensures energy efficiency and customized comfort. The thermostat learns your system’s behavior to optimize heating and cooling, providing consistent comfort while reducing energy usage. Its intuitive interface and advanced features make it a versatile solution for modern home HVAC systems, ensuring ease of use and optimal performance.
1.2 Key Features of the Honeywell T6 Pro Wi-Fi Thermostat
The Honeywell T6 Pro Wi-Fi Thermostat offers advanced features for enhanced comfort and efficiency. It includes Wi-Fi connectivity, voice control through smart assistants, and geofencing for location-based temperature adjustments. The thermostat supports scheduling and energy reports through the Honeywell Home app, allowing users to monitor and optimize their energy usage. Its UWP mounting system simplifies installation, while the optional cover plate ensures a clean finish. The device also features smart response technology, learning your system’s performance to optimize heating and cooling cycles, ensuring consistent comfort and energy savings. These features make it a versatile and user-friendly smart thermostat option.
Pre-Installation Requirements and Preparation
Verify system compatibility, electrical requirements, and safety guidelines. Gather tools, ensure power is off, and prepare the area properly before starting the installation process.
2.1 Unboxing and Package Contents
Upon opening the package, you’ll find the Honeywell T6 Pro Wi-Fi Thermostat, UWP Mounting System, Honeywell Standard Installation Adapter, and a decorative cover plate. The box also includes screws, anchors, and a professional install guide. Ensure all items are present before proceeding. The UWP Mounting System simplifies wall installation, while the adapter ensures compatibility with standard junction boxes. The decorative cover plate helps conceal any wall imperfections, providing a clean finish. Review the contents and guide to familiarize yourself with the components and installation process.
2.2 Understanding the UWP Mounting System
The UWP Mounting System is a versatile and user-friendly wall-mounting solution designed for the Honeywell T6 Pro Wi-Fi Thermostat. It includes a mounting plate, hooks, and snaps for secure installation. The system allows for easy leveling and alignment, ensuring a professional finish. To install, position the UWP on the wall, mark the holes, and secure it using the provided screws and anchors. The UWP is compatible with the Honeywell Standard Installation Adapter, enabling seamless integration with your HVAC system. Proper installation ensures stability and reliable performance of the thermostat.
2;3 System Compatibility and Electrical Requirements
The Honeywell T6 Pro Wi-Fi Thermostat is compatible with most HVAC systems, including conventional, heat pump, and dual-fuel configurations. It requires a 24V AC, 60Hz power supply and does not need a common wire (C-wire) for operation, making it versatile for various setups. The thermostat supports 2-stage heating and 2-stage cooling systems. Ensure your system matches the terminal designations (R, C, W, Y, G, etc.) and verify wiring compatibility before installation. This thermostat is designed for low-voltage systems and is not compatible with line voltage or millivolt systems. Always check the electrical requirements to ensure proper functionality.
Installation Process
The Honeywell T6 Pro Wi-Fi Thermostat installation involves mounting the UWP system, wiring, and configuring the thermostat using the Honeywell Home app for seamless setup and control.
3.1 Turning Off Power and Safety Precautions
Before starting the installation, ensure the power to the HVAC system is turned off at the breaker box or switch. Verify the power is off using a voltage tester to avoid electrical shock. Never work on live circuits, as this poses a significant electrical hazard. Wear protective gear, such as gloves and safety glasses, to prevent injury. If you are unsure about any step, consult a licensed HVAC technician. Always follow local electrical codes and safety guidelines to ensure a safe and successful installation process.
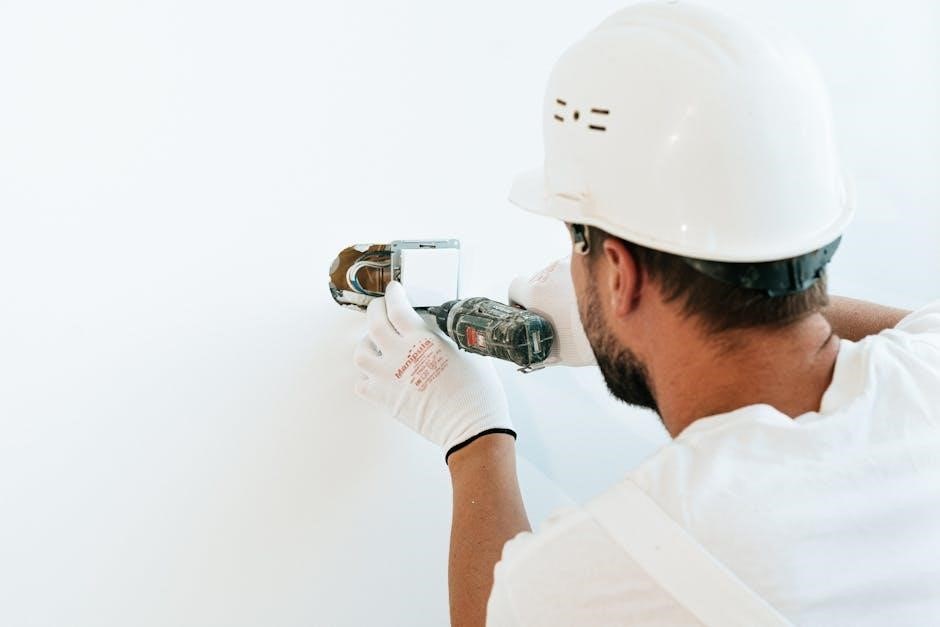
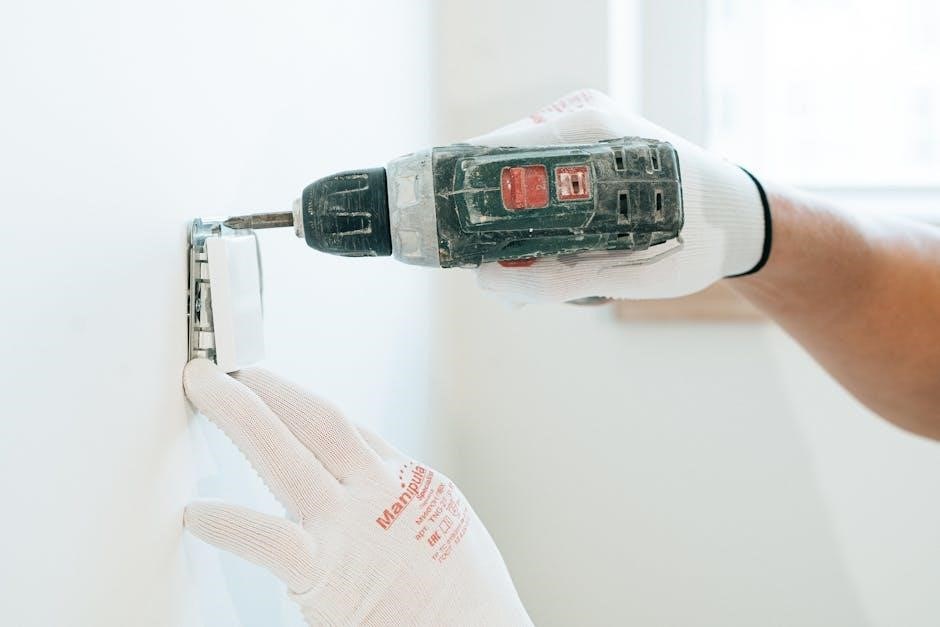
3.2 Mounting the UWP on the Wall
Begin by positioning the UWP (Universal Wall Plate) on the wall, ensuring it is level and properly aligned. Mark the hole positions using the plate as a template. Drill pilot holes at the marked locations and insert the provided wall anchors. Secure the UWP to the wall using the 8-1/2″ screws for red anchors and 6-1/2″ screws for yellow anchors. Tighten the screws firmly but avoid overtightening to prevent damage. Ensure the UWP is snug and evenly mounted, as this provides a stable base for the thermostat installation.
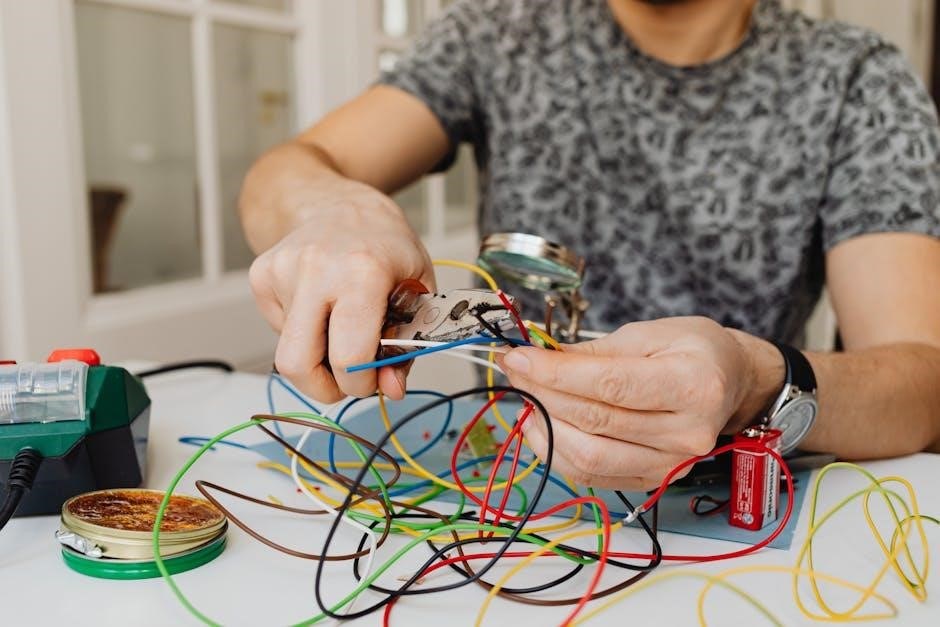
3.3 Wiring the Thermostat (Terminal Designations)
Connect the wires to the appropriate terminals on the UWP, ensuring correct correspondence to your HVAC system. Refer to the terminal designations in the manual, typically labeled as R (24V power), W (heating), Y (cooling), G (fan), C (common), and others as needed. Secure the wires firmly to avoid loose connections. If your system requires a common wire (C), ensure it is properly connected for reliable operation. Double-check all connections to match your system’s configuration, and verify compatibility with your HVAC setup before proceeding. Always turn off power at the breaker before wiring to prevent electrical hazards.
3.4 Installing the Honeywell Standard Installation Adapter
The Honeywell Standard Installation Adapter (J-box adapter) is included to facilitate mounting the thermostat to an electrical junction box. This adapter is optional and used when the UWP cannot be directly attached to the wall or when covering gaps from previous installations. Align the adapter with the junction box, ensuring it fits securely. Attach it using the provided screws, then mount the UWP over the adapter. This ensures a neat and professional installation, accommodating various wall configurations. The adapter helps maintain a flush fit and provides additional support for the thermostat.
Connecting to Wi-Fi and Initial Setup
Download the Honeywell Home app, available on the App Store or Google Play. Use the app to configure the thermostat and connect it to your Wi-Fi network.
4.1 Downloading and Using the Honeywell Home App
Download the Honeywell Home app from the App Store or Google Play. This app allows you to configure the thermostat, monitor settings, and control temperature remotely. After installation, open the app and follow the prompts to connect your thermostat to your Wi-Fi network. The app also features a hidden PRO installation mode, enabling professionals to set up the thermostat and invite customers to connect to the installed device. Use the app to schedule temperatures, access advanced settings, and ensure optimal performance. The app is essential for both initial setup and ongoing management of your Honeywell T6 Pro Wi-Fi Thermostat.
4.2 Configuring the Thermostat Using the App
After connecting to Wi-Fi, open the Honeywell Home app to configure your thermostat. Follow the in-app prompts to complete initial setup, including location and system type. Use the app to set temperature schedules, enable geofencing, or adjust comfort settings. The app also allows access to advanced features like energy usage reports and system tests. For professionals, the hidden PRO installation feature enables configuration and customer invitation. Customize settings to optimize performance and ensure seamless integration with your HVAC system. The app provides real-time monitoring and control, making it easy to manage your home’s comfort from anywhere.
4.3 Performing a System Test
After configuring the thermostat, perform a system test to ensure proper functionality. Open the Honeywell Home app and navigate to the test section. Run a full system check to verify heating, cooling, and fan operations. This test confirms wiring connections and system compatibility. Monitor the thermostat’s display for error messages. If issues arise, refer to the troubleshooting section in the manual. A successful test ensures your system is ready for everyday use, providing reliable temperature control and energy efficiency. This step is crucial for validating the installation and configuration accuracy.

Advanced Features and Configuration
The Honeywell T6 Pro Wi-Fi Thermostat offers advanced features like scheduling, geofencing, and energy-saving modes. Configure settings through the Honeywell Home app for optimal performance and comfort.
5.1 Installer Setup Options (ISU) ⸺ Advanced Menu
The Installer Setup Options (ISU) provide advanced configuration tools for professional installers. Access the ISU menu through the Honeywell Home app or the thermostat’s interface by touching “START SETUP.” Key features include adjusting screen brightness, enabling or disabling certain system alerts, and performing a system test to ensure proper functionality. Additionally, the ISU allows installers to set up geofencing, energy-saving modes, and custom scheduling options. These settings ensure the thermostat operates efficiently and meets specific user preferences, offering a tailored experience for optimal home comfort and energy savings.
5.2 Scheduling and Programming the Thermostat
The Honeywell T6 Pro Wi-Fi Thermostat offers flexible scheduling and programming options. Use the Honeywell Home app to create custom temperature schedules, optimizing comfort and energy use. Enable geofencing to adjust settings based on your location. The thermostat also learns your system’s performance over time, ensuring efficient heating and cooling. Program up to six periods per day, with options for Wake, Leave, Return, and Sleep events. Advanced features like energy-saving modes and vacation settings further enhance customization, allowing you to tailor the system to your lifestyle while reducing energy consumption.
Troubleshooting Common Issues
6.2 Addressing Installation and Wiring Issues
Common installation issues include incorrect wiring connections or loose terminals. Verify all wires are securely attached to the correct terminals. If the thermostat displays an “No Equipment” message, check for proper wiring and power supply. Ensure the UWP mounting system is level and securely fastened. For complex wiring problems, consult the professional install guide or contact a licensed HVAC technician. Always turn off power at the breaker before troubleshooting to avoid electrical hazards. Correct any shorted wires or voltage issues promptly to ensure safe and proper system operation.
6.1 Resolving Wi-Fi Connectivity Problems
If the Honeywell T6 Pro Wi-Fi Thermostat fails to connect to your network, restart the router and thermostat. Ensure the Wi-Fi password is correct and the thermostat is within range of the router. Check for firmware updates in the Honeywell Home app, as outdated software can cause connectivity issues. Reset the thermostat by removing it from the UWP mounting system and reinstalling it. If problems persist, verify network compatibility and consult the professional install guide for troubleshooting steps; Contact Honeywell support if issues remain unresolved.
Ensure the power is off at the breaker before addressing wiring issues. Verify all connections match the terminal designations in the manual. Common mistakes include incorrect wire placement or loose connections. Use the UWP mounting system correctly, ensuring it is level and securely attached. If the thermostat doesn’t power on, check for blown fuses or circuit breakers. Review the professional install guide for specific wiring configurations. If issues persist, consult a licensed HVAC technician to avoid system damage. Proper installation ensures safe and efficient operation of the Honeywell T6 Pro Wi-Fi Thermostat.
After completing installation, perform final checks to ensure proper functionality. Verify thermostat operation, Wi-Fi connectivity, and scheduling. Refer to the manual for any additional adjustments for optimal performance.
7.1 Verifying Proper Installation and Functionality
After installation, ensure the Honeywell T6 Pro Wi-Fi Thermostat is functioning correctly. Verify that the UWP mounting system is securely attached and level. Check all wiring connections for accuracy and tightness. Power on the system at the breaker and test heating, cooling, and fan operations. Use the Honeywell Home app to confirm Wi-Fi connectivity and perform a full system test. Ensure scheduling and programming options work as intended. Review the thermostat’s display for proper temperature reading and responsiveness to manual adjustments. Address any issues promptly to ensure optimal performance.
7.2 Final Tips for Optimal Performance
To ensure the Honeywell T6 Pro Wi-Fi Thermostat operates at its best, regular maintenance and smart usage practices are essential. Always keep the thermostat’s display clean and free from obstructions. Use the Honeywell Home app to monitor energy usage and adjust settings for efficiency. Enable geofencing and smart alerts for automated temperature adjustments. Schedule regular system checks and update the app and thermostat firmware when available. Maintain a stable Wi-Fi connection and ensure the device is placed away from direct sunlight or drafts for accurate temperature readings.