Honeywell TH5220D1029 Installation Guide: A Comprehensive Plan
This comprehensive guide unlocks the full potential of your Honeywell TH5220D1029 thermostat. It’s designed for both beginners and experienced users‚ offering detailed steps for a seamless installation and optimal performance.
Welcome to the world of smart climate control! The Honeywell TH5220D1029 is a non-programmable thermostat designed to provide reliable and consistent temperature management for your home. This model offers a user-friendly interface‚ making it an excellent choice for those seeking simplicity without sacrificing functionality. It’s a step up from traditional thermostats‚ offering improved accuracy and efficiency.
This thermostat is ideal for standard heating and cooling systems‚ and its straightforward design ensures a relatively easy installation process. The TH5220D1029 allows for precise temperature settings‚ contributing to a more comfortable living environment and potentially reducing energy consumption.
Before you begin the installation‚ it’s crucial to understand the basic components and functionalities of the thermostat. This guide will walk you through each step‚ from verifying package contents to setting up your preferred temperature settings. Familiarizing yourself with the thermostat’s features will empower you to maximize its benefits and enjoy a consistently comfortable home. This manual explores its potential for creativity and innovation‚ helping you get started with your product.
Package Contents & Verification
Upon opening your Honeywell TH5220D1029 package‚ carefully verify that all listed components are present and undamaged. Your package should include the thermostat itself‚ a backplate for wall mounting‚ mounting screws and anchors‚ and a detailed installation guide – this document! A wire label sheet is also included to help identify your existing wiring.
Inspect each item for any signs of shipping damage‚ such as cracks‚ dents‚ or loose parts. If any components are missing or appear damaged‚ do not proceed with the installation. Contact Honeywell support immediately for assistance and replacement parts. Using damaged components could compromise the thermostat’s functionality and safety.
Take a moment to familiarize yourself with each part. The backplate provides a secure mounting point‚ while the screws and anchors ensure a stable installation on various wall types. The wire labels are essential for correctly identifying the wires during the connection process. Accurate verification now will save you potential headaches later. This ensures a smooth and successful installation experience.
Safety Precautions
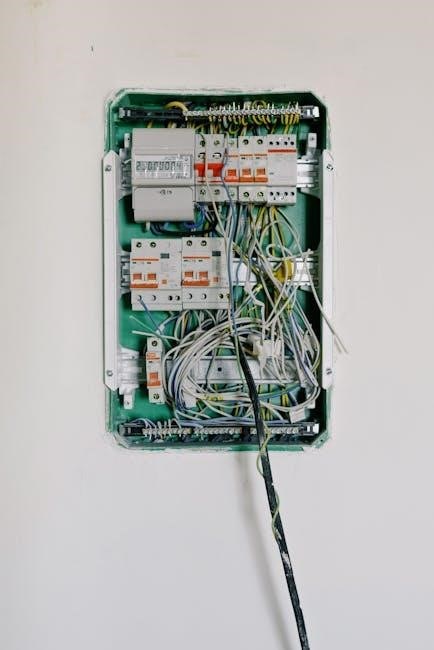
Before beginning the installation of your Honeywell TH5220D1029 thermostat‚ prioritize safety. Always disconnect power to your heating and cooling system at the breaker box. This prevents electrical shock and potential damage to the system. Confirm the power is off with a non-contact voltage tester.
If you are uncomfortable working with electrical wiring‚ consult a qualified HVAC technician. Incorrect wiring can lead to system malfunction‚ fire hazards‚ or personal injury. Do not attempt repairs or modifications beyond your skill level. Safety is paramount.
Wear appropriate safety glasses to protect your eyes from dust and debris during installation. Be mindful of potential pinch points when handling the thermostat and backplate. Keep small parts‚ such as screws‚ away from children and pets.
Follow all local electrical codes and regulations during the installation process. If you are unsure about any aspect of the installation‚ refer to the detailed instructions in this guide or contact Honeywell support for clarification. Remember‚ a safe installation is a successful installation.
Tools Required for Installation
To ensure a smooth and efficient installation of your Honeywell TH5220D1029 thermostat‚ gather the necessary tools beforehand. A Phillips head screwdriver is essential for securing the backplate and thermostat to the wall‚ as well as connecting wiring. A flathead screwdriver may be needed for certain terminal connections.

A wire stripper/cutter is crucial for preparing the thermostat wires‚ ensuring clean and secure connections. A non-contact voltage tester is vital for confirming the power is completely off before working with any wiring. A level will help ensure the thermostat is mounted straight for accurate readings and a professional appearance.
Pencil for marking screw locations and wire identification. Drill with appropriate drill bits (if new mounting holes are required). Wall anchors (if mounting to drywall). Small pliers can assist with bending or manipulating wires. Finally‚ a digital multimeter can be helpful for advanced troubleshooting‚ though not strictly required for basic installation.
System Compatibility Check
Before beginning the installation‚ verifying your HVAC system’s compatibility with the Honeywell TH5220D1029 is paramount. This thermostat is generally compatible with most 24V heating and cooling systems‚ including furnaces‚ air conditioners‚ heat pumps‚ and boilers.
However‚ it’s crucial to confirm that your system doesn’t utilize line voltage (120V or 240V) as the TH5220D1029 is not designed for such systems. Check your existing thermostat wiring; if wires are thick gauge and directly connected to mains voltage‚ compatibility is unlikely.
Millivolt systems‚ commonly found in fireplaces‚ are also incompatible. The thermostat supports single-stage‚ multi-stage‚ and heat pump systems with or without auxiliary heat. Confirm your system type before proceeding. If unsure‚ consult a qualified HVAC technician to avoid damage to the thermostat or your HVAC equipment. A compatibility mismatch can lead to improper operation or safety hazards.
Wiring Diagram Overview
Understanding the wiring diagram is essential for a successful Honeywell TH5220D1029 installation. The thermostat utilizes standard color-coded terminals: R (power)‚ C (common)‚ W (heat)‚ Y (cool)‚ and G (fan). Carefully examine your existing thermostat’s wiring‚ noting the wire colors connected to each terminal.
The ‘R’ terminal receives 24V power‚ while ‘C’ provides the return path‚ completing the circuit. ‘W’ activates the heating system‚ ‘Y’ controls cooling‚ and ‘G’ operates the fan. Some systems may include additional wires for auxiliary heat (AUX/E) or reversing valves (O/B) for heat pumps.
Refer to the detailed wiring diagram included in this guide and compare it to your existing setup. Incorrect wiring can damage the thermostat or your HVAC system. If you encounter unfamiliar wiring or are unsure about any connections‚ consult a qualified HVAC professional. Always power off your HVAC system at the breaker before working with any wiring.
Installing the Backplate
Begin the installation by mounting the backplate to the wall. Ensure the power to your HVAC system is completely switched off at the breaker before proceeding. Locate the existing thermostat wires and carefully detach them from the old thermostat’s base. Label each wire with the corresponding terminal designation (R‚ C‚ W‚ Y‚ G‚ etc.) for easy identification.
Position the backplate on the wall‚ using a level to ensure it’s straight. Mark the screw holes with a pencil. Drill pilot holes if necessary‚ and secure the backplate to the wall using the provided screws. Gently feed the thermostat wires through the opening in the backplate.
Confirm the backplate is firmly mounted and level. A secure backplate is crucial for proper thermostat operation and a clean appearance. Double-check that the wires are neatly arranged and accessible for connection to the thermostat itself.
Connecting the Wiring – R‚ C‚ W‚ Y‚ G Terminals
Carefully connect each labeled wire to the corresponding terminal on the thermostat base. The ‘R’ terminal typically connects to the 24V power source (red wire). The ‘C’ terminal is the common wire (usually blue) and is essential for consistent power. ‘W’ connects to the heating system (white wire)‚ ‘Y’ to the cooling system (yellow wire)‚ and ‘G’ to the fan (green wire).
Ensure each wire is securely inserted into its terminal‚ avoiding any loose connections. Gently tug on each wire to confirm it’s firmly held in place. Incorrect wiring can damage your HVAC system or the thermostat‚ so double-check your connections against the wiring diagram.
If you have a heat pump system‚ additional wiring may be required. Refer to the detailed wiring diagram included with your thermostat for specific instructions. Take a photo of the wiring before proceeding‚ as a reference point if needed.
Powering On & Initial Setup
Once the wiring is complete and verified‚ carefully attach the thermostat display unit to the backplate. It should click securely into place. Now‚ restore power to your HVAC system at the breaker box. The thermostat display should illuminate‚ indicating it’s receiving power.
The initial setup will guide you through essential configurations. First‚ you’ll likely be prompted to select your system type – furnace‚ heat pump‚ or others. Next‚ the thermostat will ask for your zip code to access local weather information‚ crucial for accurate temperature readings and scheduling.
Follow the on-screen prompts to set the date and time. Accurate timekeeping is vital for programmed schedules. Finally‚ the thermostat may ask about your preferred temperature units (Fahrenheit or Celsius). Take your time during this process to ensure accurate settings for optimal performance.
Setting the System Mode (Heat‚ Cool‚ Auto)
The Honeywell TH5220D1029 offers three primary system modes: Heat‚ Cool‚ and Auto. Understanding these modes is crucial for comfortable and efficient climate control. Heat mode activates your heating system when the thermostat detects temperatures below your setpoint‚ providing warmth.
Cool mode engages your air conditioning when temperatures rise above your desired level‚ delivering cooling relief. Auto mode intelligently switches between heating and cooling to maintain your set temperature‚ adapting to changing weather conditions. To select a mode‚ navigate to the main menu on the thermostat display.
Use the up and down arrow buttons to cycle through the available options – Heat‚ Cool‚ and Auto. Confirm your selection by pressing the ‘OK’ or ‘Select’ button. The currently selected mode will be displayed prominently on the thermostat screen. Consider your local climate and seasonal needs when choosing the appropriate mode for consistent comfort.
Programming the Temperature Schedule
The Honeywell TH5220D1029 allows for customized temperature scheduling‚ optimizing comfort and energy savings. Programming a schedule means setting different temperatures for different times of the day‚ aligning with your lifestyle. Access the scheduling function through the thermostat’s main menu‚ typically labeled “Schedule” or “Programming”.
You’ll likely be presented with options to create separate schedules for weekdays and weekends. Within each day‚ you can define multiple periods – such as “Wake‚” “Leave‚” “Return‚” and “Sleep” – each with its own target temperature. Use the thermostat’s buttons to adjust the time and temperature for each period.
Consider setting lower temperatures when you’re away or asleep to conserve energy. The thermostat will automatically adjust the temperature according to your programmed schedule‚ providing consistent comfort without manual intervention. Review and adjust your schedule periodically to ensure it continues to meet your needs.

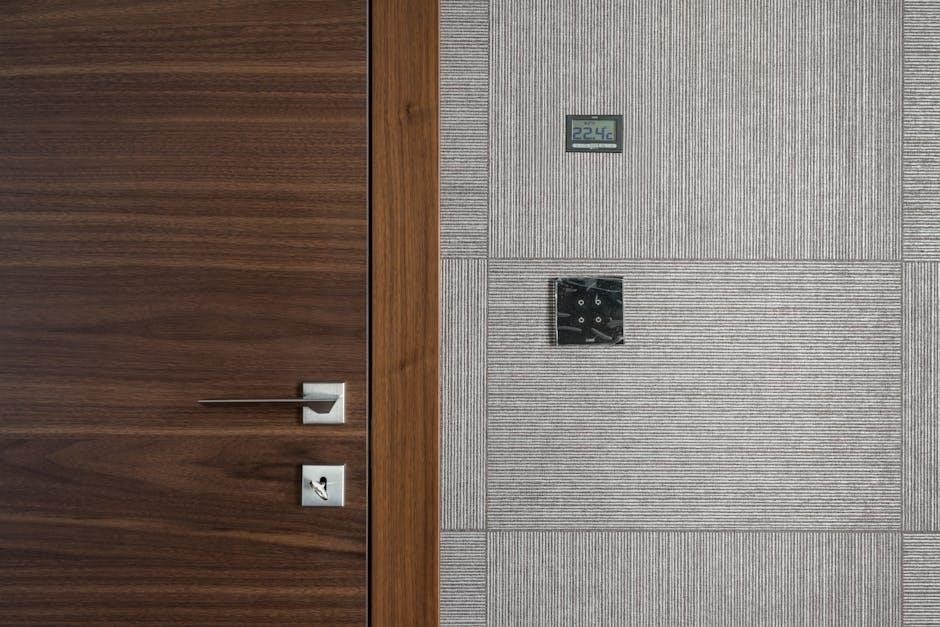
Understanding the Display Icons
The Honeywell TH5220D1029 utilizes a range of display icons to communicate system status and operation. Familiarizing yourself with these icons is crucial for effective thermostat management. A flame icon indicates the heating system is actively running‚ while a snowflake signifies cooling is in progress. A fan icon displays whether the fan is set to “Auto” or “On”.
The “Hold” icon signifies that the programmed schedule is temporarily overridden‚ maintaining a constant temperature. A Wi-Fi icon confirms a successful connection to your home network‚ enabling remote control via the Honeywell Home app. Low battery warnings are indicated by a battery icon‚ prompting replacement;
Other icons may represent system errors or specific operating modes like “Vacation”. Refer to the thermostat’s user manual for a complete and detailed explanation of each icon. Paying attention to these visual cues allows you to quickly assess the system’s performance and address any potential issues promptly.
Wi-Fi Connectivity & Honeywell Home App
Connecting your Honeywell TH5220D1029 to your home Wi-Fi network unlocks a world of remote control and advanced features through the Honeywell Home app. Download the app from the App Store (iOS) or Google Play Store (Android) and create an account. Follow the in-app instructions to initiate the Wi-Fi connection process on your thermostat.
Ensure your thermostat is within range of your Wi-Fi router and that you have your network password readily available. The app guides you through selecting your network and entering the credentials. Once connected‚ you can adjust the temperature‚ set schedules‚ and monitor energy usage from anywhere with an internet connection.
The Honeywell Home app also provides access to advanced features like geofencing‚ which automatically adjusts the temperature based on your location. Regular app updates ensure optimal performance and access to the latest features. Enjoy the convenience and control that Wi-Fi connectivity brings to your home comfort;
Registering Your Thermostat
Registering your Honeywell TH5220D1029 thermostat is a crucial step to activate the full warranty coverage and unlock access to exclusive features and support resources. This process typically involves creating a Honeywell Home account‚ if you haven’t already‚ and then adding your thermostat to your account profile.
You’ll need the thermostat’s serial number‚ usually found on the back of the thermostat or on the original packaging. Follow the prompts within the Honeywell Home app or on the Honeywell Home website to enter the serial number and complete the registration process. Registration confirms your ownership and allows Honeywell to provide tailored support.
Benefits of registration include access to extended warranty options‚ priority customer support‚ and notifications about software updates and new features. Keeping your thermostat registered ensures you receive the best possible experience and maximizes the value of your investment. Don’t delay – register your thermostat today!
Troubleshooting Common Installation Issues
During the Honeywell TH5220D1029 installation‚ you might encounter a few common hurdles; One frequent issue is incorrect wiring; double-check that each wire is securely connected to the corresponding terminal (R‚ C‚ W‚ Y‚ G). A lack of power is another common problem – verify the circuit breaker supplying power to the thermostat is switched on.
If the thermostat doesn’t power on‚ ensure the ‘C’ wire (common wire) is correctly connected‚ as it’s essential for providing continuous power. Compatibility issues with your HVAC system can also arise; confirm your system meets the thermostat’s compatibility requirements. For unresponsive displays‚ try resetting the thermostat by briefly removing it from the backplate.
If you’re still facing difficulties‚ consult the detailed troubleshooting section in the full manual or visit the Honeywell Home support website. Remember to always prioritize safety and disconnect power before attempting any wiring adjustments. Careful review of these common issues can save time and frustration.
Addressing Error Codes
The Honeywell TH5220D1029 thermostat utilizes error codes to diagnose system malfunctions. Understanding these codes is crucial for efficient troubleshooting. A common code‚ “E1‚” often indicates a loss of communication with the outdoor unit‚ suggesting a wiring issue or a faulty outdoor sensor. “E2” typically signals a problem with the indoor blower motor‚ potentially requiring professional HVAC service.

If you encounter an “E3” error‚ it usually points to a sensor failure – either the room temperature sensor or the outdoor temperature sensor. For “E4” codes‚ investigate potential issues with the heating or cooling system’s control board. Refer to the comprehensive error code list in the user manual for a complete explanation of each code and recommended solutions.
Before attempting any repairs‚ ensure the system is powered off. Some errors can be resolved with simple wiring checks‚ while others necessitate professional assistance. Honeywell’s support website provides detailed information and troubleshooting guides for specific error codes‚ aiding in a swift resolution.
Advanced Settings & Customization
Beyond basic temperature control‚ the Honeywell TH5220D1029 offers a range of advanced settings for personalized comfort. Explore the “System Settings” menu to adjust parameters like cycle rate‚ influencing how frequently the heating or cooling system turns on and off. Fine-tune the temperature swing‚ dictating the degree of temperature change before the system activates.
Customize fan control options‚ selecting “Auto” for on-demand operation or “On” for continuous air circulation. The thermostat allows for humidity control integration‚ if compatible with your HVAC system‚ enabling precise humidity level management. Adjust backlight settings for optimal display visibility and configure display units between Fahrenheit and Celsius.

For energy optimization‚ delve into the “Smart Response” feature‚ which learns your heating and cooling patterns. Utilize the “Geofencing” capability (via the Honeywell Home app) to automatically adjust temperatures based on your location. These advanced customizations empower you to tailor the thermostat to your specific needs and maximize energy efficiency.
Filter Change Reminders Setup
Maintaining a clean air filter is crucial for HVAC system efficiency and indoor air quality. The Honeywell TH5220D1029 simplifies this with customizable filter change reminders. Access the “Maintenance” or “Filter” menu within the thermostat settings. Here‚ you can set a reminder based on a time interval – typically 30‚ 60‚ or 90 days – or a total runtime of your system.
The thermostat will display a notification on the screen when the reminder is triggered‚ prompting you to replace the filter. You can also reset the reminder after completing the filter change. For accurate reminders‚ consider your filter type and usage patterns; heavily used systems or homes with pets may require more frequent changes.
Some models allow you to specify the filter size for more precise tracking. Ignoring filter change reminders can lead to reduced airflow‚ increased energy consumption‚ and potential system damage. Regular filter replacement ensures optimal performance and prolongs the life of your HVAC equipment‚ contributing to a healthier home environment.
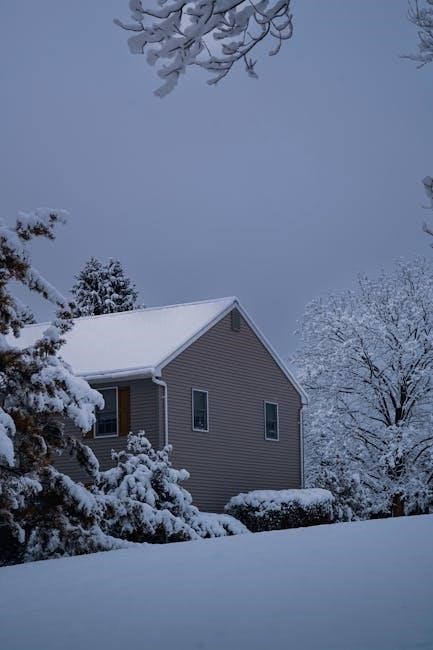
Vacation Mode Configuration
Planning an extended absence? The Honeywell TH5220D1029’s Vacation Mode minimizes energy consumption while protecting your home from extreme temperatures. To activate‚ navigate to the “Vacation” or “Away” setting in the main menu. You’ll be prompted to enter the duration of your trip – specify the start date and the number of days you’ll be gone.
During Vacation Mode‚ the thermostat maintains a pre-set temperature‚ typically a lower heating temperature and a higher cooling temperature‚ to prevent frozen pipes or excessive heat. These temperatures are usually adjustable within the Vacation Mode settings. The system will automatically resume your regular schedule upon your return.

Some models offer a “Smart Away” feature‚ learning your habits and automatically entering Vacation Mode when it detects you’re away. This eliminates the need for manual activation. Utilizing Vacation Mode can significantly reduce energy bills and provide peace of mind‚ knowing your home is protected while you’re enjoying your time away.
Resetting the Thermostat to Factory Defaults
Occasionally‚ you might need to restore your Honeywell TH5220D1029 thermostat to its original factory settings. This is useful for troubleshooting persistent issues‚ preparing the thermostat for a new owner‚ or clearing customized programming. The reset process typically involves accessing the thermostat’s settings menu.
Navigate through the menu options – often found under “Settings‚” “Advanced‚” or “System” – until you locate the “Reset” or “Factory Defaults” option. Confirm your selection‚ as this action will erase all personalized settings‚ including your schedule‚ Wi-Fi connections‚ and temperature preferences.
Be aware that a factory reset will return the thermostat to its out-of-the-box state‚ requiring you to re-enter your system configuration and programming. The thermostat may briefly cycle through a startup sequence after the reset is complete. Consult the full manual for specific button combinations or menu paths‚ as they can vary slightly depending on the software version.

Warranty Information & Support Resources
Your Honeywell TH5220D1029 thermostat is backed by a limited warranty‚ protecting against defects in materials and workmanship; The standard warranty period typically extends for one year from the date of purchase‚ though extended warranties may be available. Retain your proof of purchase for warranty claims.
For warranty service‚ contact Honeywell Home directly through their official website or customer support hotline. Online‚ you’ll find a comprehensive FAQ section‚ troubleshooting guides‚ and downloadable resources. The Honeywell Home support team can assist with installation questions‚ operational issues‚ and warranty procedures.
Additionally‚ numerous online forums and communities dedicated to home automation and HVAC systems offer valuable peer-to-peer support. These platforms can provide insights from other users and potential solutions to common problems. Remember to always refer to the official Honeywell documentation for accurate and up-to-date information regarding your thermostat’s warranty and support options.